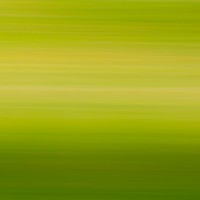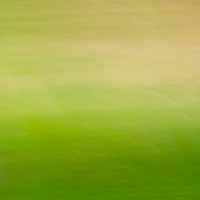


Abstract photography using in-camera motion blur
Using motion blur as a technique for creative photography can be a very satisfying pursuit, allowing abstract fine-art compositions to be created in-camera, needing little in the way of (boring!) time in front of the computer to achieve really striking results. The technique also benefits from being quite straightforward, achievable with most cameras, and also in most choices of location. Perfect if you are lacking creative inspiration in a location.
Why intentionally motion blur images?
Most of us are in pursuit of pin-sharp images, so why choose to spoil our images by intentionally blurring our images? Start by having a look at the gallery below. In removing the recognisable detail from scene, we force ourselves, the photographer, to look only at the colour, texture, contrast and tone in the scene. This translates to us looking much further through a potential image than composition and framing. A great skill to nurture for any photographer. From the viewers point of view the same applies – the images become about colour, texture and tone and not directly about subject.
Another really useful side affect using motion blurring to create abstract photography is the subject-matter really does not matter – you can get equally great results in nature or in the city centre providing you are looking out for colour, texture and tone.
How to creative effective motion blur in-camera
The principle is simple, to use an intentional panning movement of the camera combined with a slow enough shutter speed to sufficiently motion blur an image, so that obviously recognisable everyday detail is removed from a scene, therefore creating an abstract composition. This might mean a traditional landscape images becomes a series of horizontal bands of green and blue or a neon-signed shop front becomes bright streaks of light.
Setting up your camera for blur!
1. Set the camera to shutter priority,
2. ISO as low as possible (ISO 80 or 100).
3. Dial in a shutter speed around 1/30 to 1/125, depending on what your camera will let you do.
4. If your camera has a built in ND filter, as my Canon Powershot G11 does, this can help you get a slow enough shutter speed in brighter light conditions, otherwise just practice this technique in lower light conditions (dusk for example).
The fun bit – taking blurry shots
Taking the shots involves pre-focusing the camera (half-pressing the shutter) on the main subject of your image.
Now, with the shutter release still 1/2 down, carefully move the camera through a quick horizontal or vertical ‘pan’ motion, fully pressing the shutter as the camera passes the main subject area. It’s important to keep panning at a constant speed right through the exposure and after the shutter has closed. This allows the tones in the image to render as horizontal or vertical bands of colour on the end exposure. Sounds fiddly, but will a little trial and error (and a lot of deleting duff shots), you will quickly start to get great results.
Motion blur tips
A monopod or tripod can help you get the blur clearly in one direction only
Experiment with shutter speed from 1/125 sec down to 1/15th sec, depending on lighting conditions.
Use a slightly telephoto focal length – the greater the magnification the greater the blur. Wide angle lenses don’t work so well here.
Look for subjects with bright colours and good contrast.
Work with what you have – if you don’t have an ND filter to work in daylight conditions, work only in lower light conditions.
Post-processing
The beauty of this technique is that the results you get are unpredictable and down to the in-camera skills you build up with practice. There is little left to do on the computer, apart from perhaps a little creative cropping (i.e. the below images are cropped to 1:1 square format to give a fine-art medium format film feel. Apart from cropping, try these tips in post-processing to enhance your results:
If your camera allows, shoot in RAW format for best results.
Increase the contrast of images to get more punch.
If your software allows control of the image clarity (positive or negative sharpness), play around with this to soften/harden the image.
Try saturating the colours somewhat.
Finally, software noise-reduction can be useful, especially in low-light using a point-and-shoot camera.
